WCA Case — Resubmission of Rejected Pleadings
If the Clerk's Office rejects a pleading on an accepted WCA case, review the rejection reason (in the email notification or in the Rejection Reason column on the case Pleadings tab), correct the issue, and resubmit by uploading the corrected document as a new pleading and submitting it to the Clerk's Office. Use the same add-pleading flow as in WCA Case — Add Pleadings to Existing Case.
You can also open the Rejected Pleadings tile on My WCA Cases to see rejected items in one place. The rejection reason is always visible on the case Pleadings tab for the affected document row.
Understanding rejection reasons
When a pleading is rejected, you receive an email with the rejection reason. Common reasons include:
| Reason | Description |
|---|---|
| Pleading not signed | The document does not contain a valid signature from the required party or attorney. |
| Incorrect or missing document | The uploaded document does not match the selected pleading type, or a required supporting document is missing. |
| Poor scan quality | The document is illegible, blurry, or otherwise cannot be reviewed. |
| Missing date | The document is signed but undated. |
How to resubmit after a rejection
Left menu → My WCA Cases → click WCA Case Number → Pleadings tab → Pleading
Step 1 — Open My WCA Cases
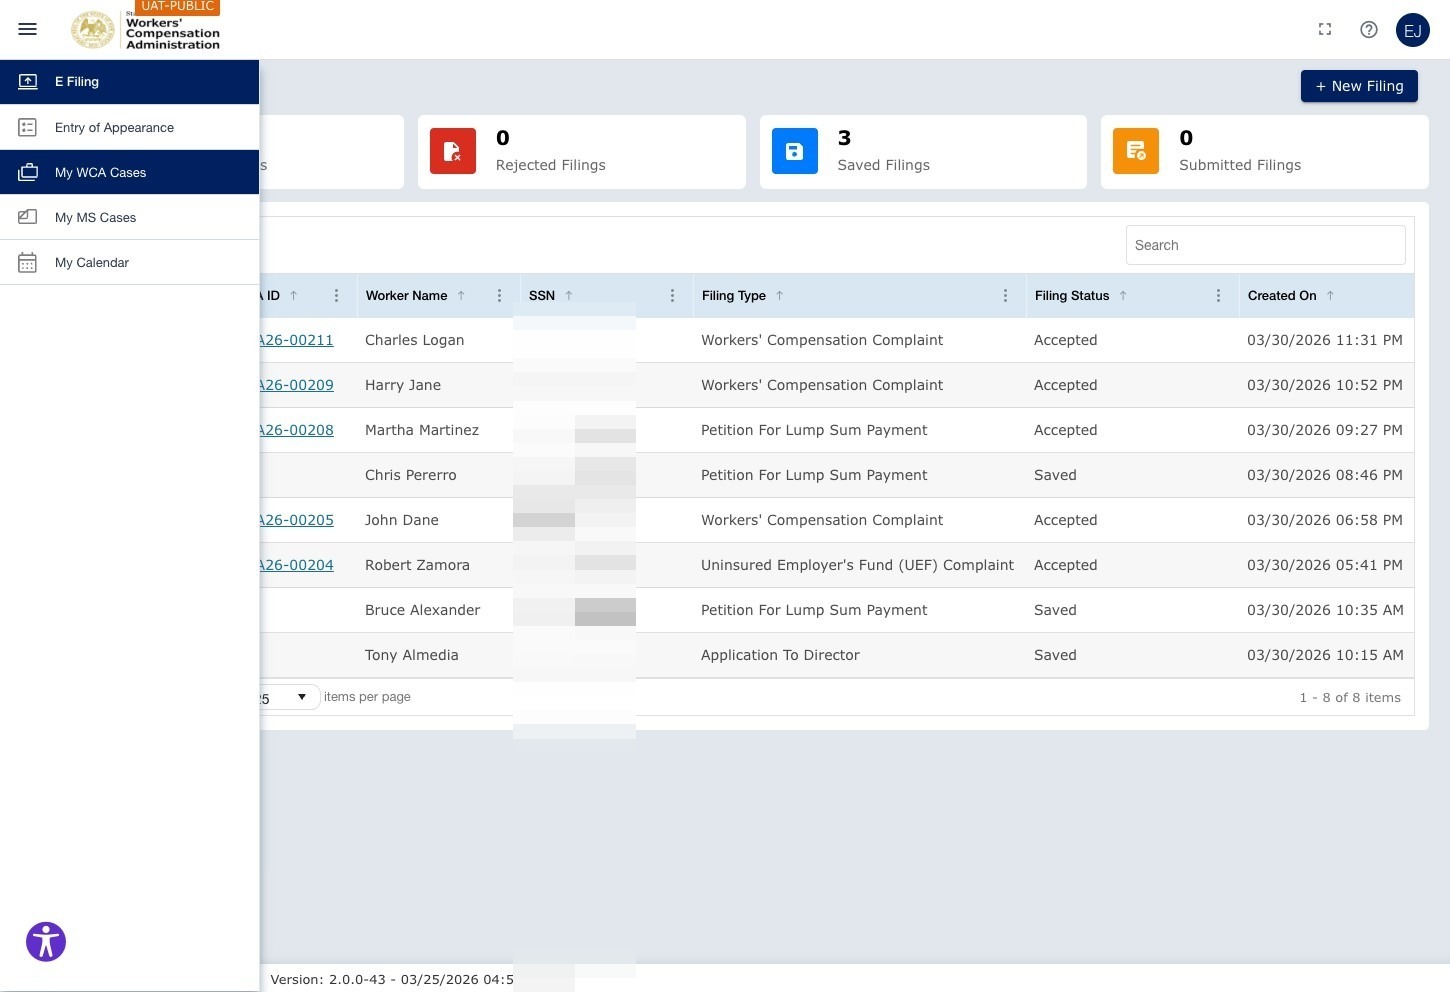
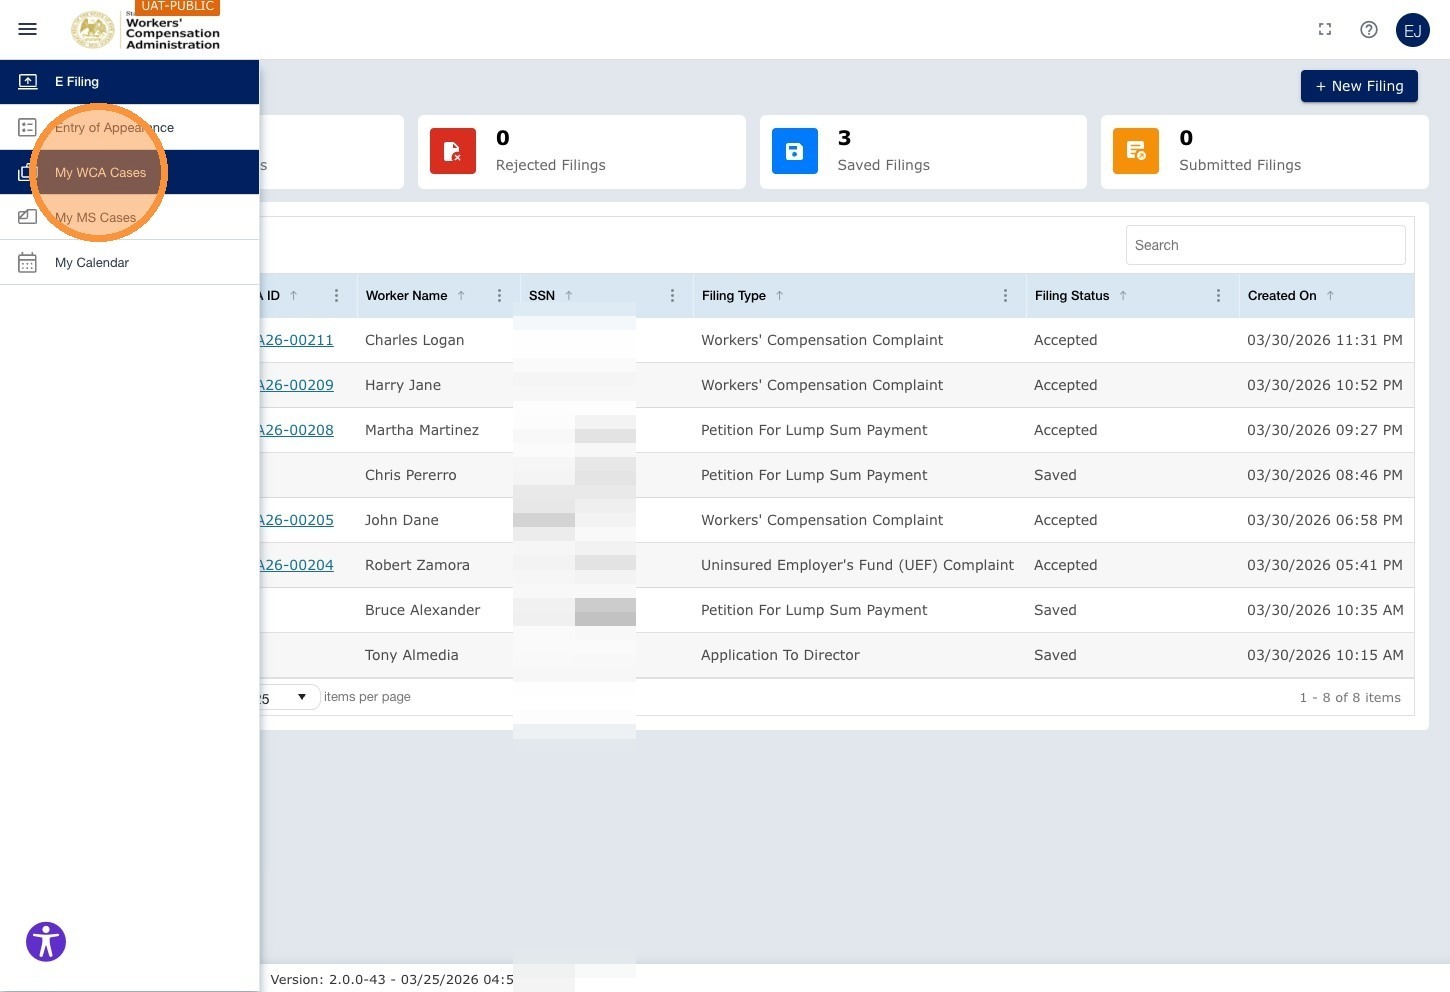
Log in to the ECF portal. The Dashboard opens showing your filings. Click My WCA Cases in the left navigation menu.
Step 2 — Check the Rejected Pleadings tile
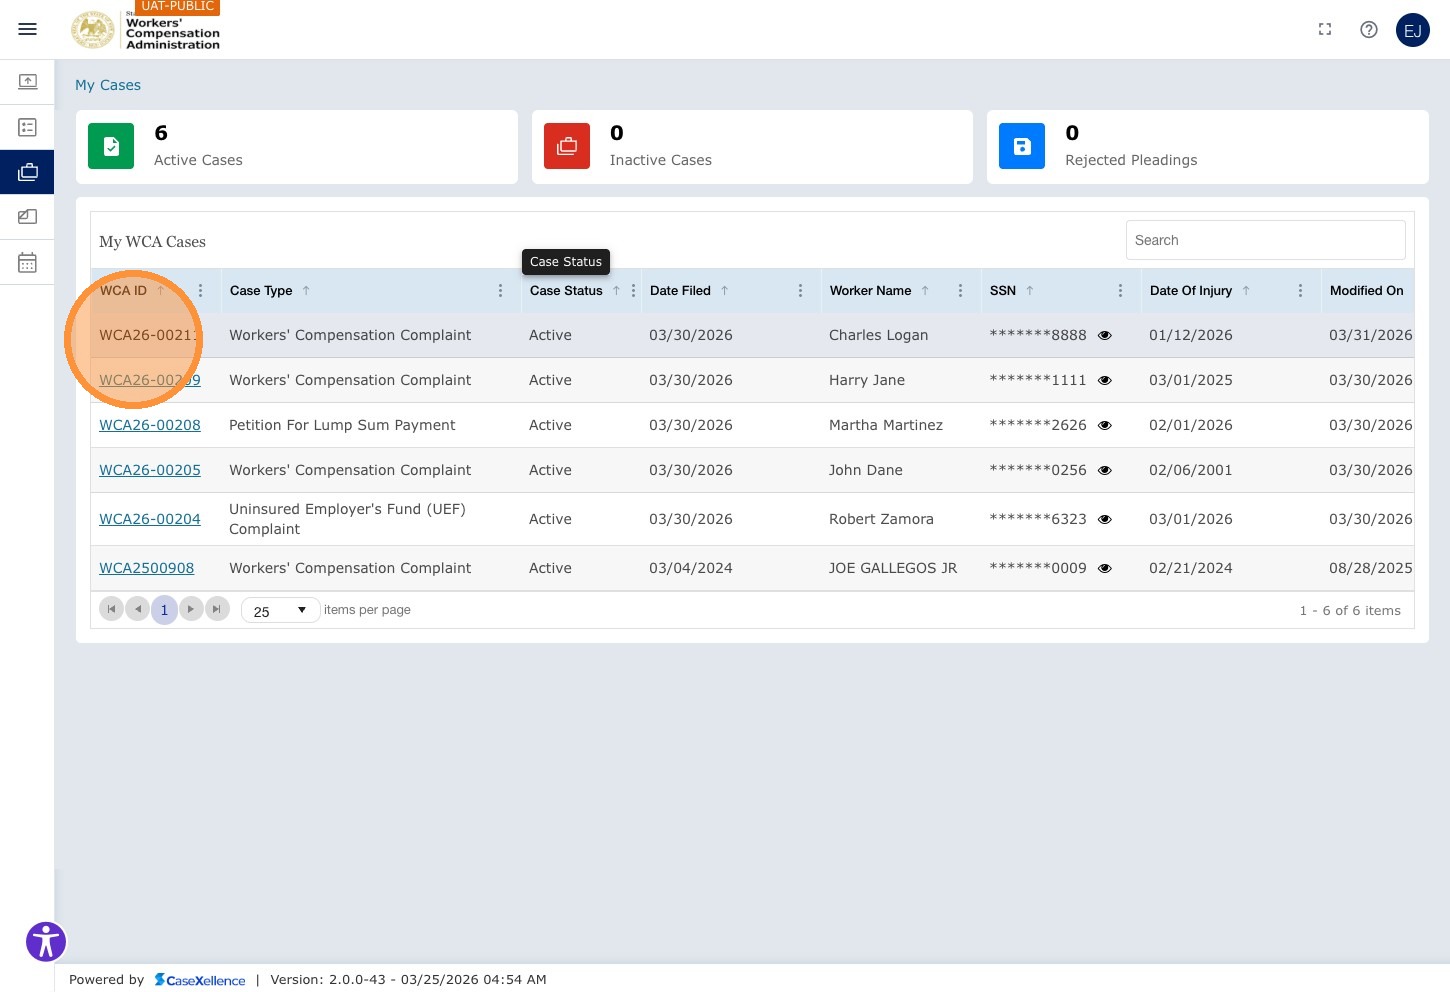
The My Cases page opens showing tiles such as Active Cases, Inactive Cases, and Rejected Pleadings. Click Rejected Pleadings to see outstanding rejections, if any.

The Rejected Pleading view shows a grid with columns such as Type, Case Status, Date Filed, Worker Name, SSN, Date of Injury, and Document ID. If there are no current rejections the grid may show No Records Available.

Even when the Rejected Pleadings count is 0, you can still view the rejection reason on the case. Open the case, go to the Pleadings tab, and check the Rejection Reason column on the rejected document row.
Step 3 — Open the case
Click My WCA Cases in the left navigation to return to the full case list. Locate the case and click its WCA Case Number hyperlink to open the case.
Step 4 — Open the Pleadings tab
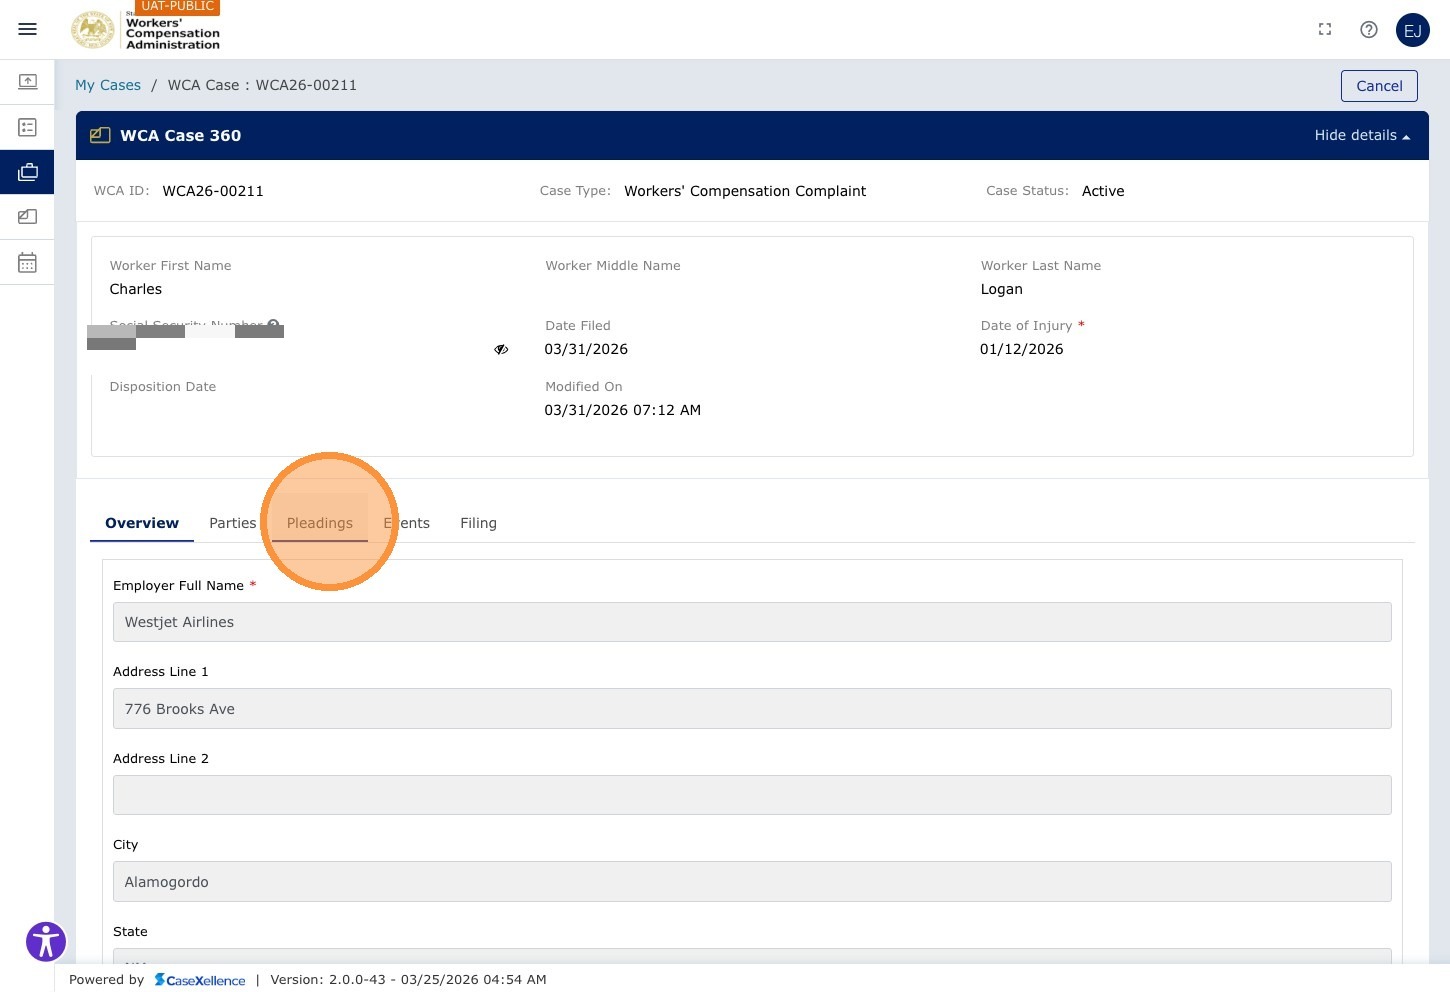
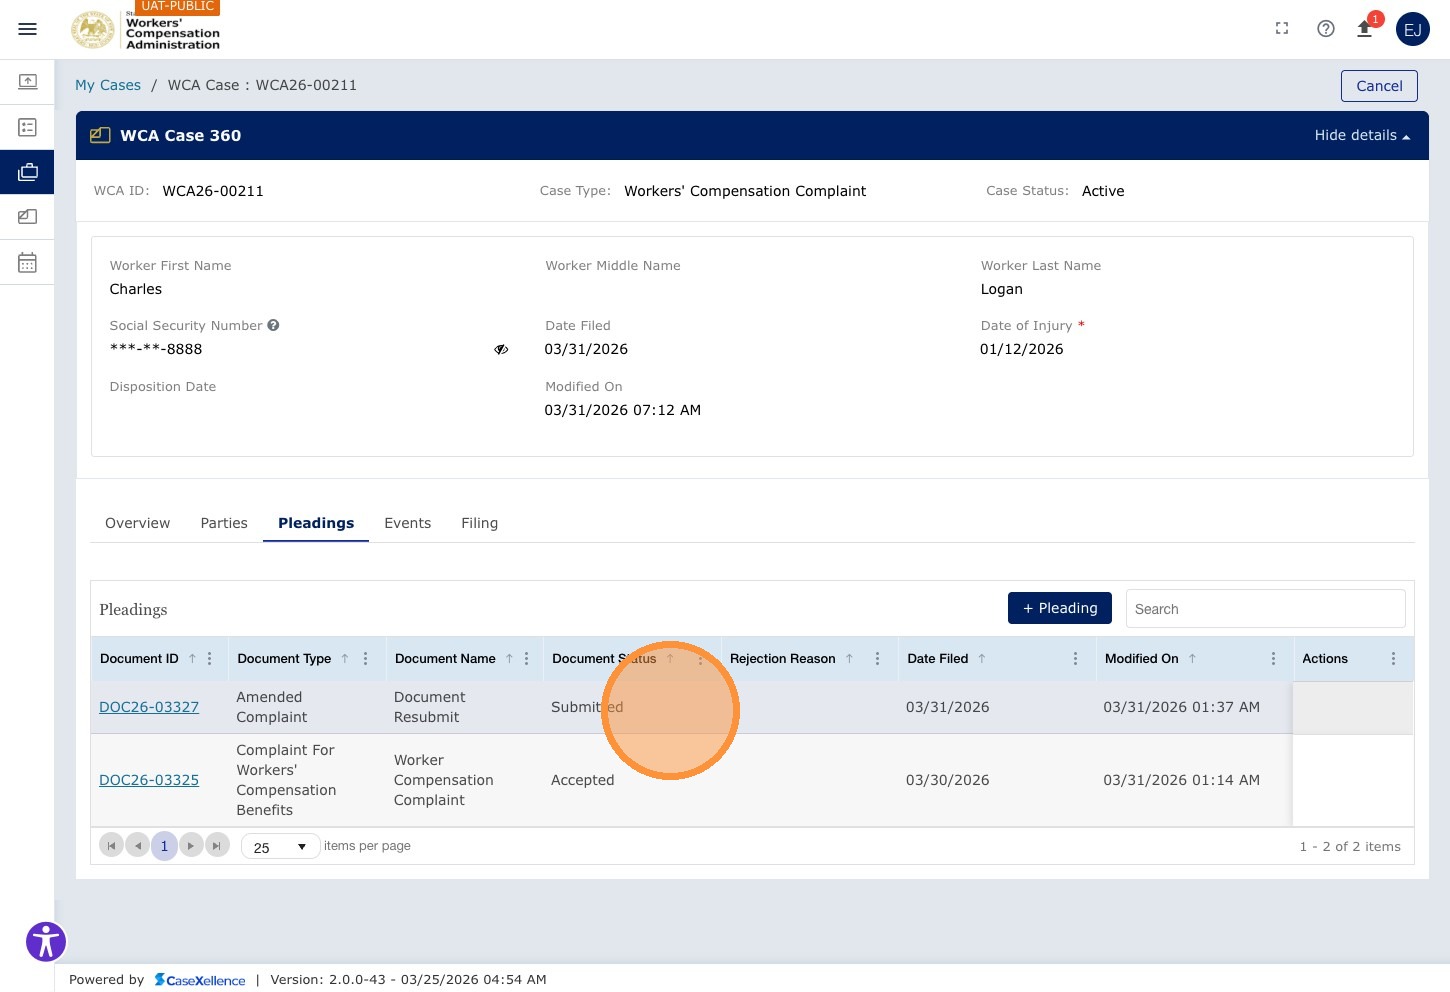
The case view opens. Click the Pleadings tab in the tab bar.
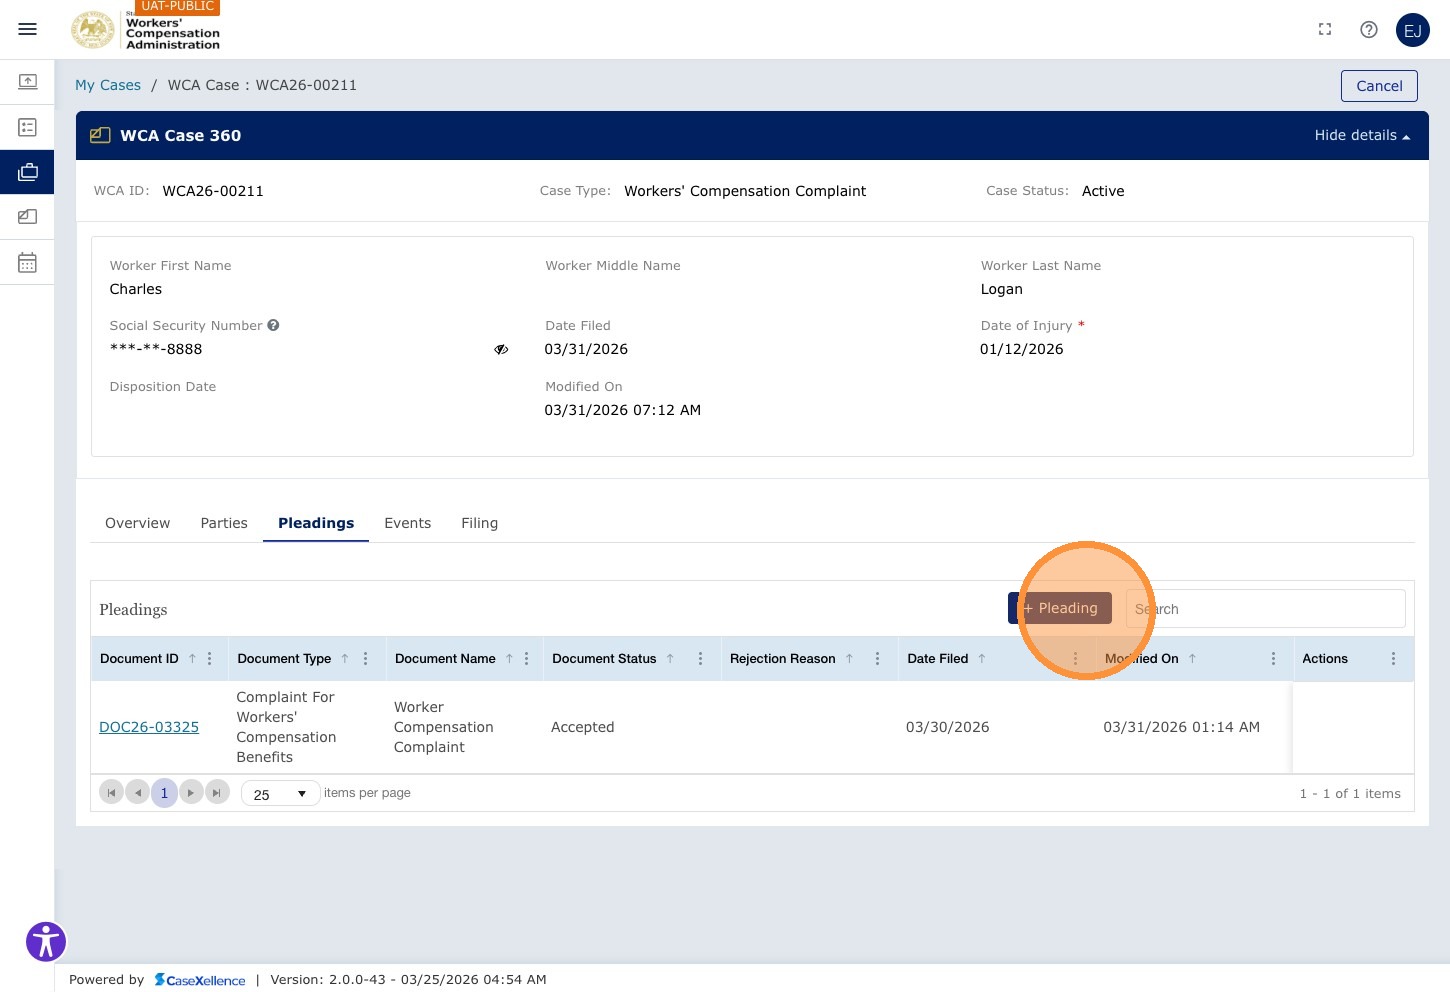
Step 5 — Add a corrected pleading
The Pleadings tab lists documents on the case. Locate the rejected row and note the Rejection Reason. Click Pleading to add a corrected document.
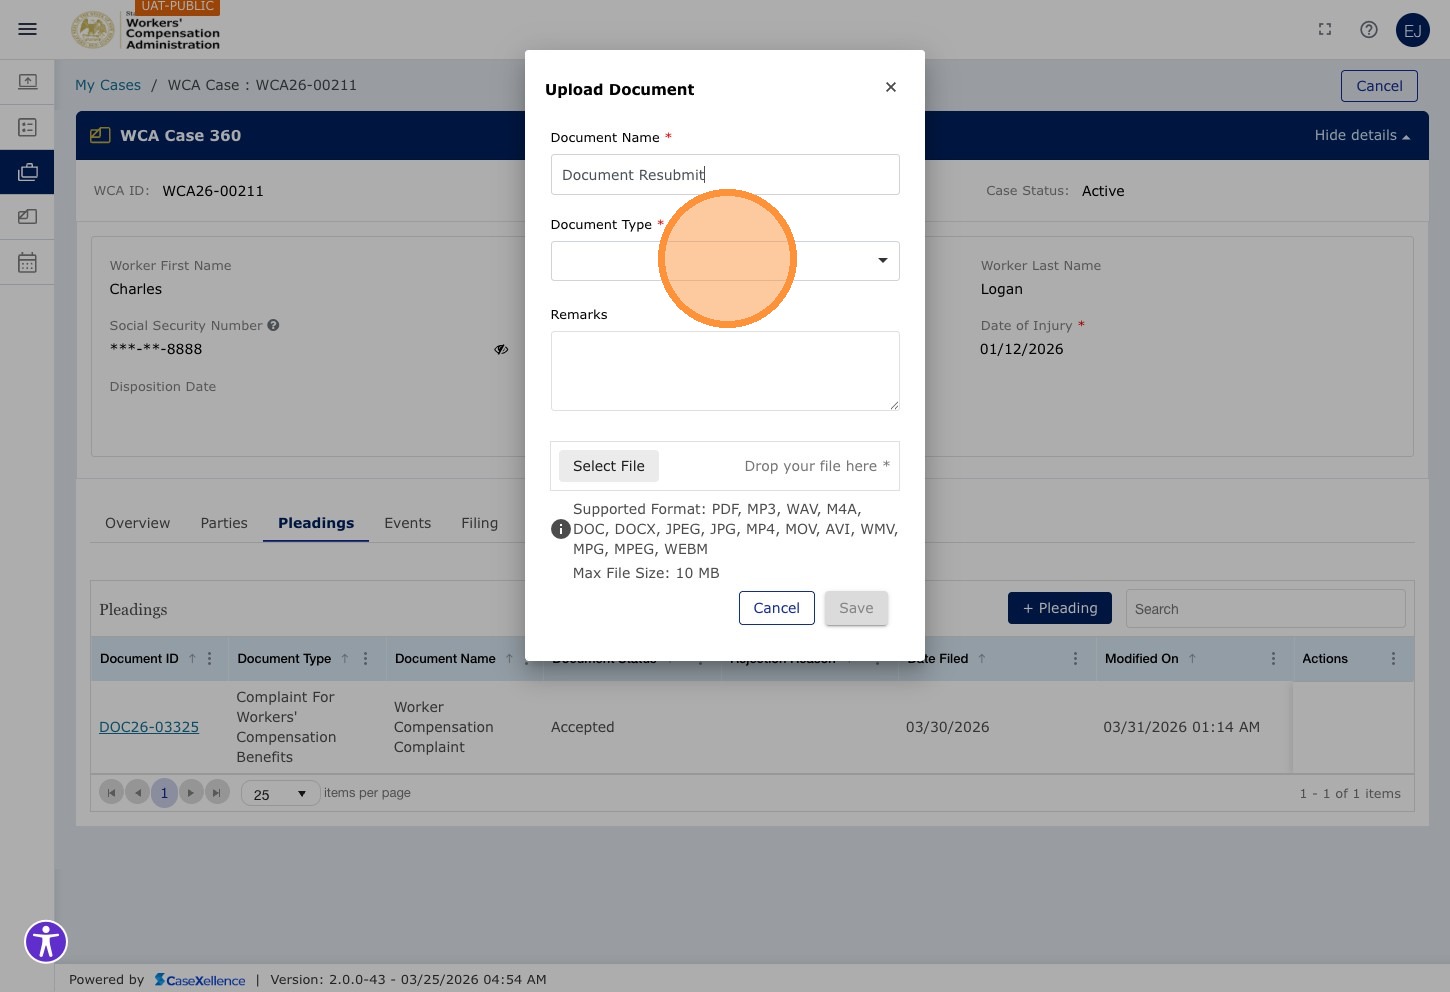
Step 6 — Enter the document name
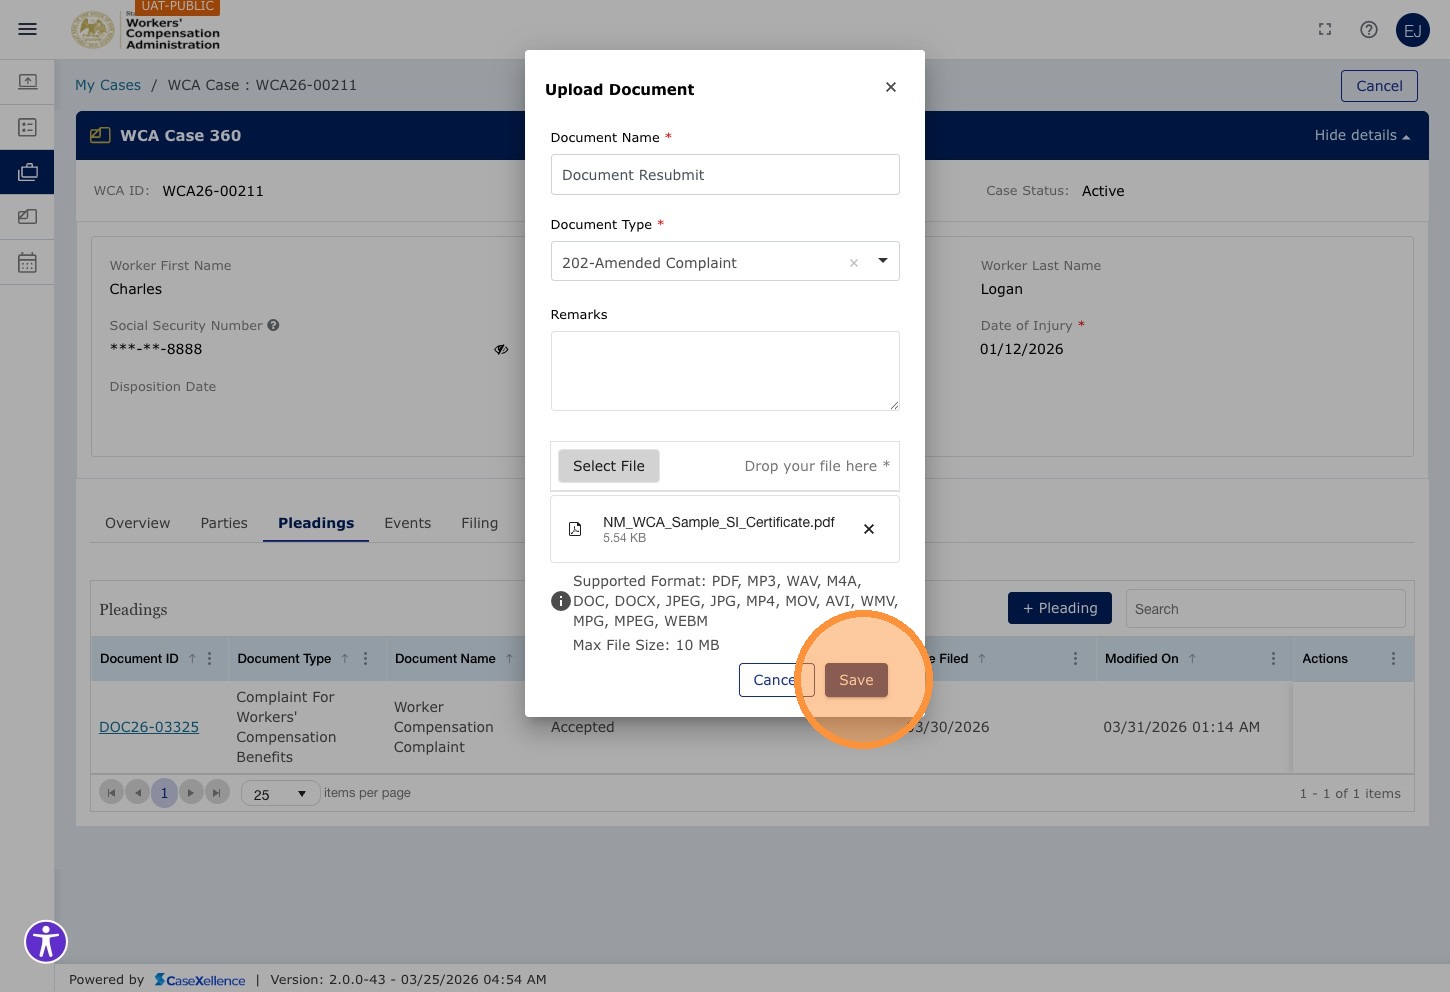
The Upload Document modal opens. Click the Document Name* field and enter a descriptive name for your corrected document.

Step 7 — Select the document type
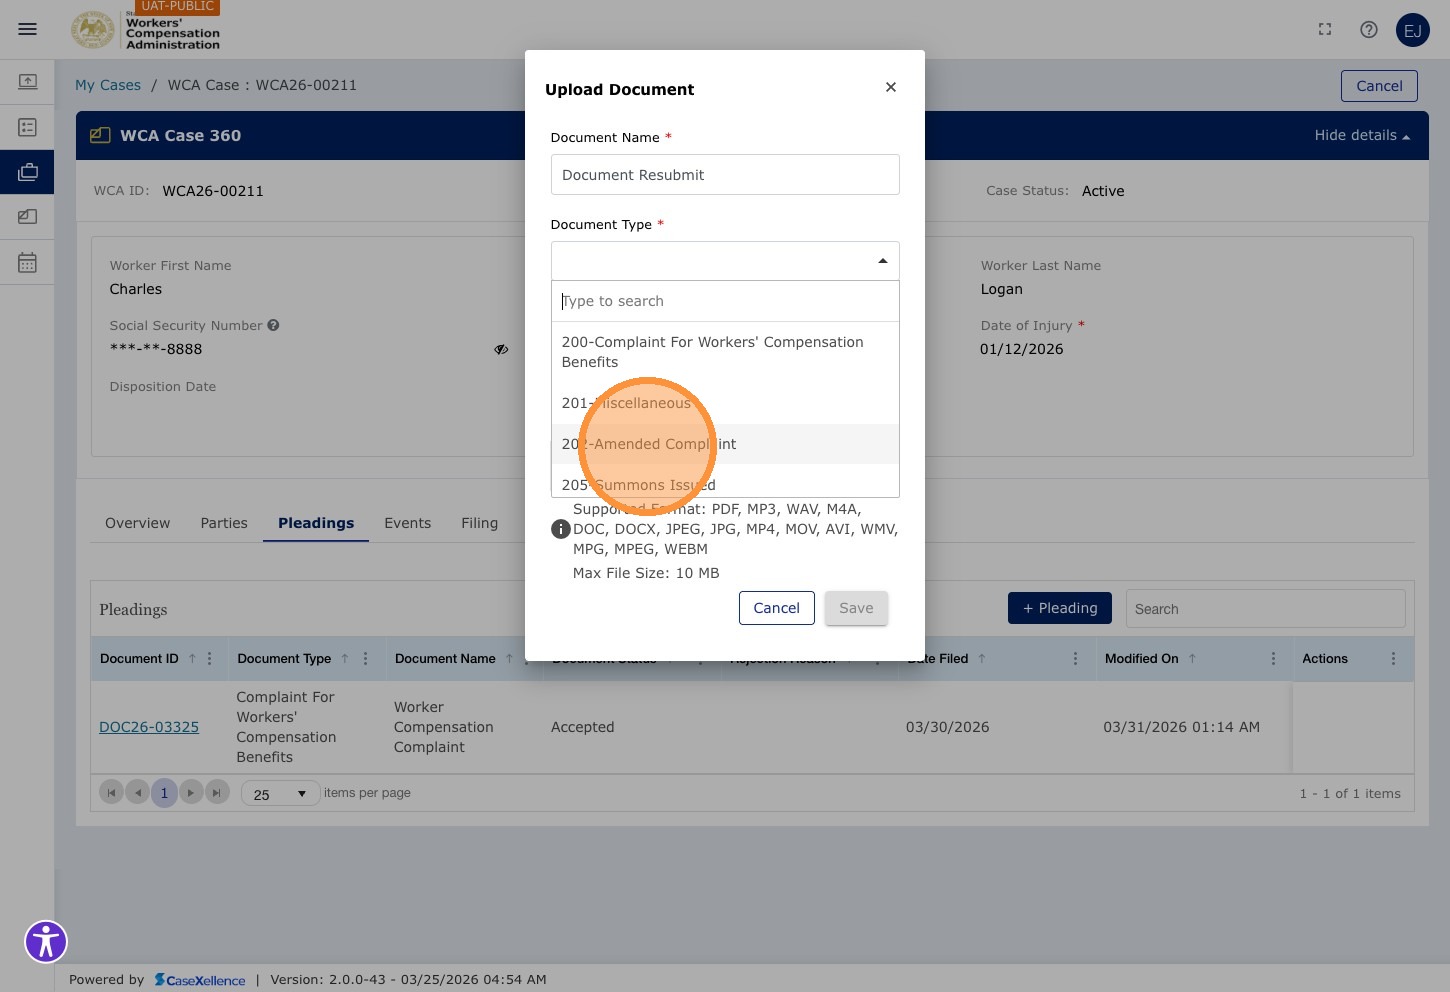
Click the Document Type* dropdown.
Select the applicable document type from the list (for example, 202-Amended Complaint when resubmitting an amended complaint).
Step 8 — Attach the corrected document
Click Select file and choose your corrected document from your computer. You can also drag and drop the file into the Drop your file here area.
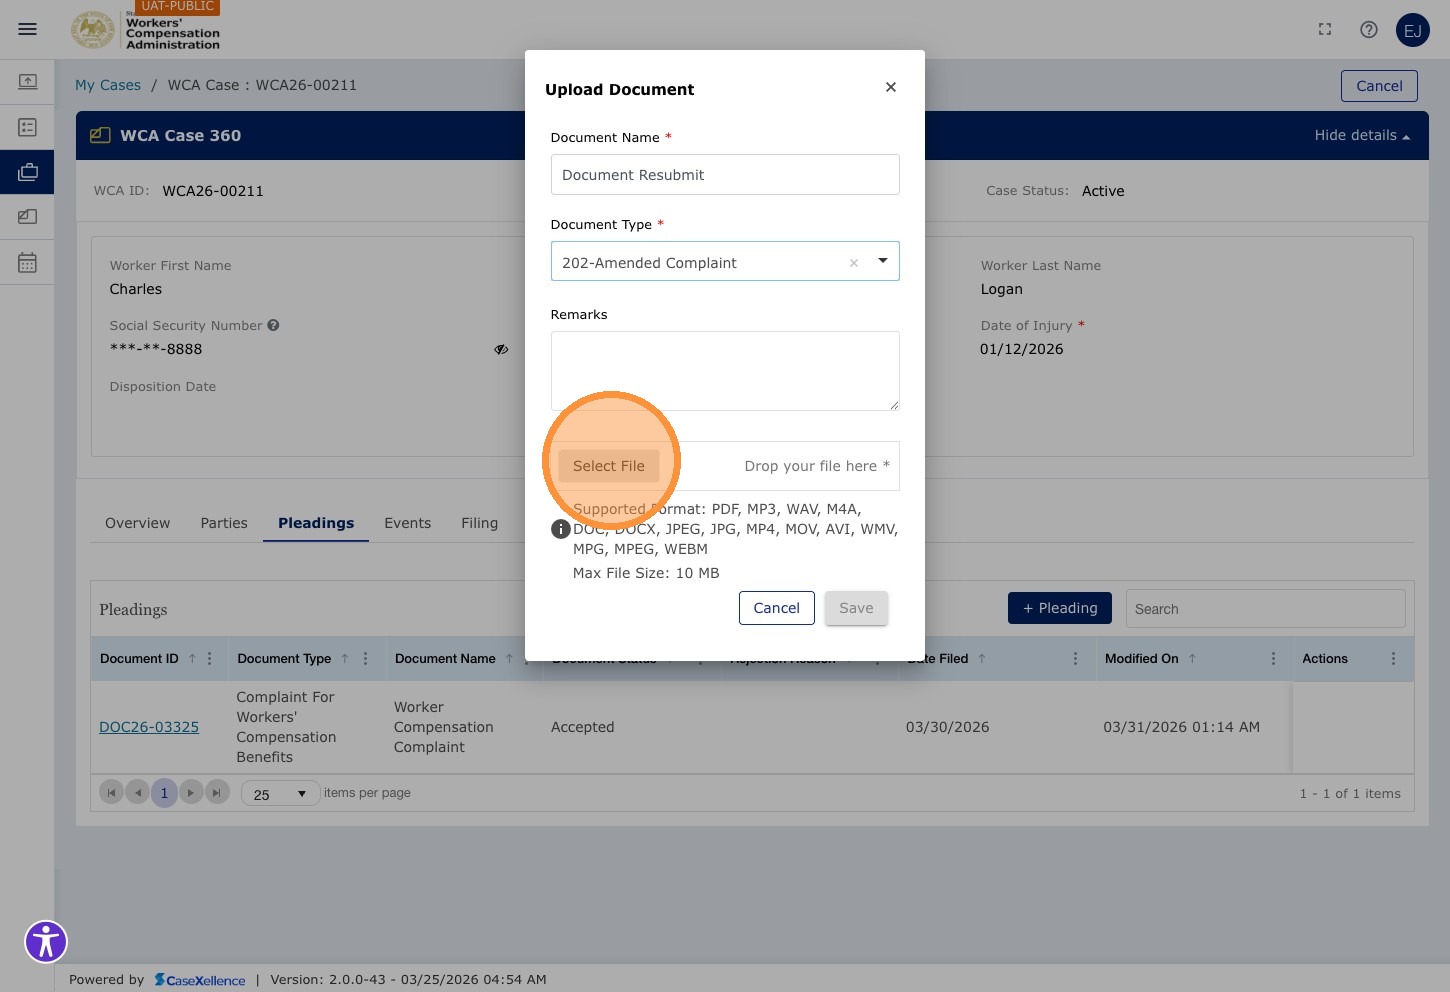
File requirements: Maximum file size is 10 MB per document. Supported formats include PDF, DOC, DOCX, JPEG, JPG, and other common formats. PDF is recommended for best results.
Step 9 — Save the pleading
Click Save to save the pleading to the case.
Step 10 — Submit the pleading
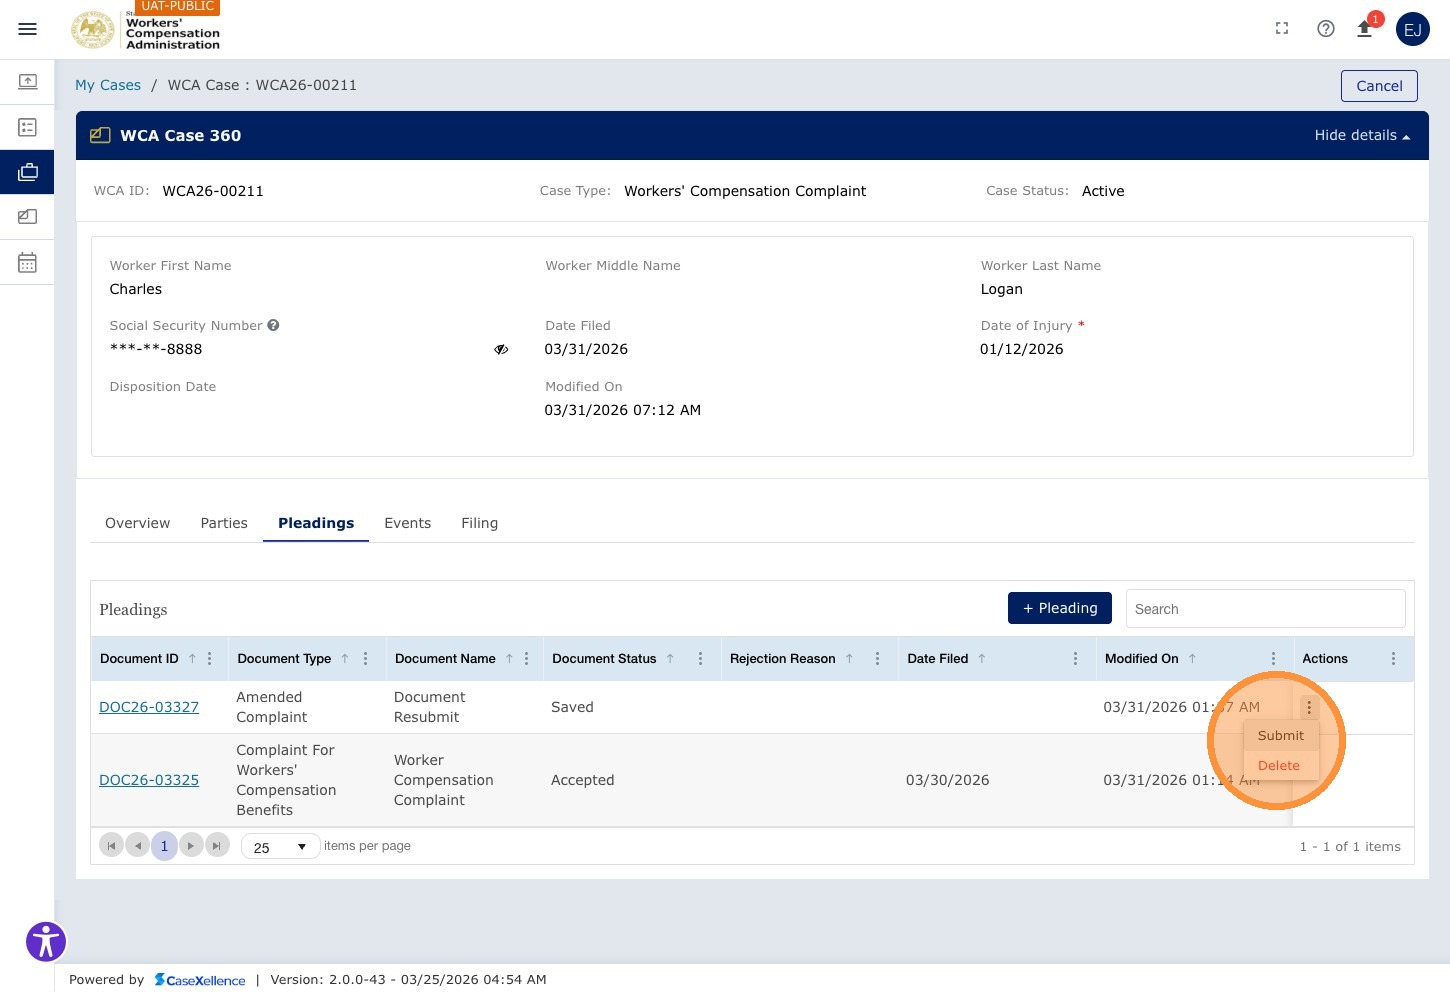
The pleading is saved and appears in the Pleadings grid with status Saved. Open the Actions menu (⋮) on the new pleading row.
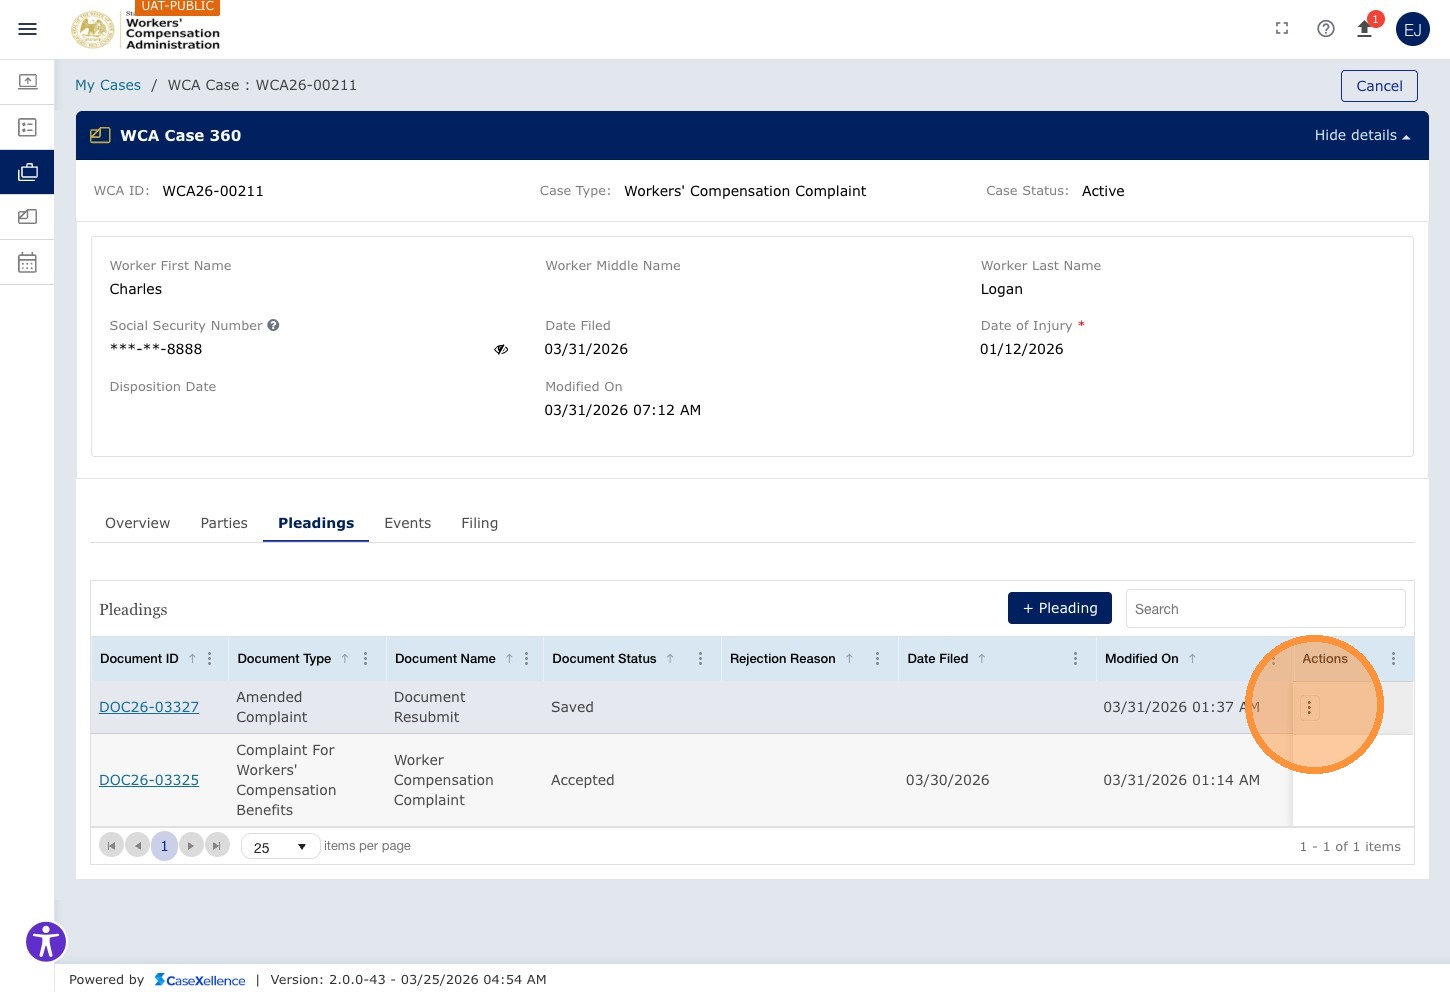
Click Submit from the Actions menu.
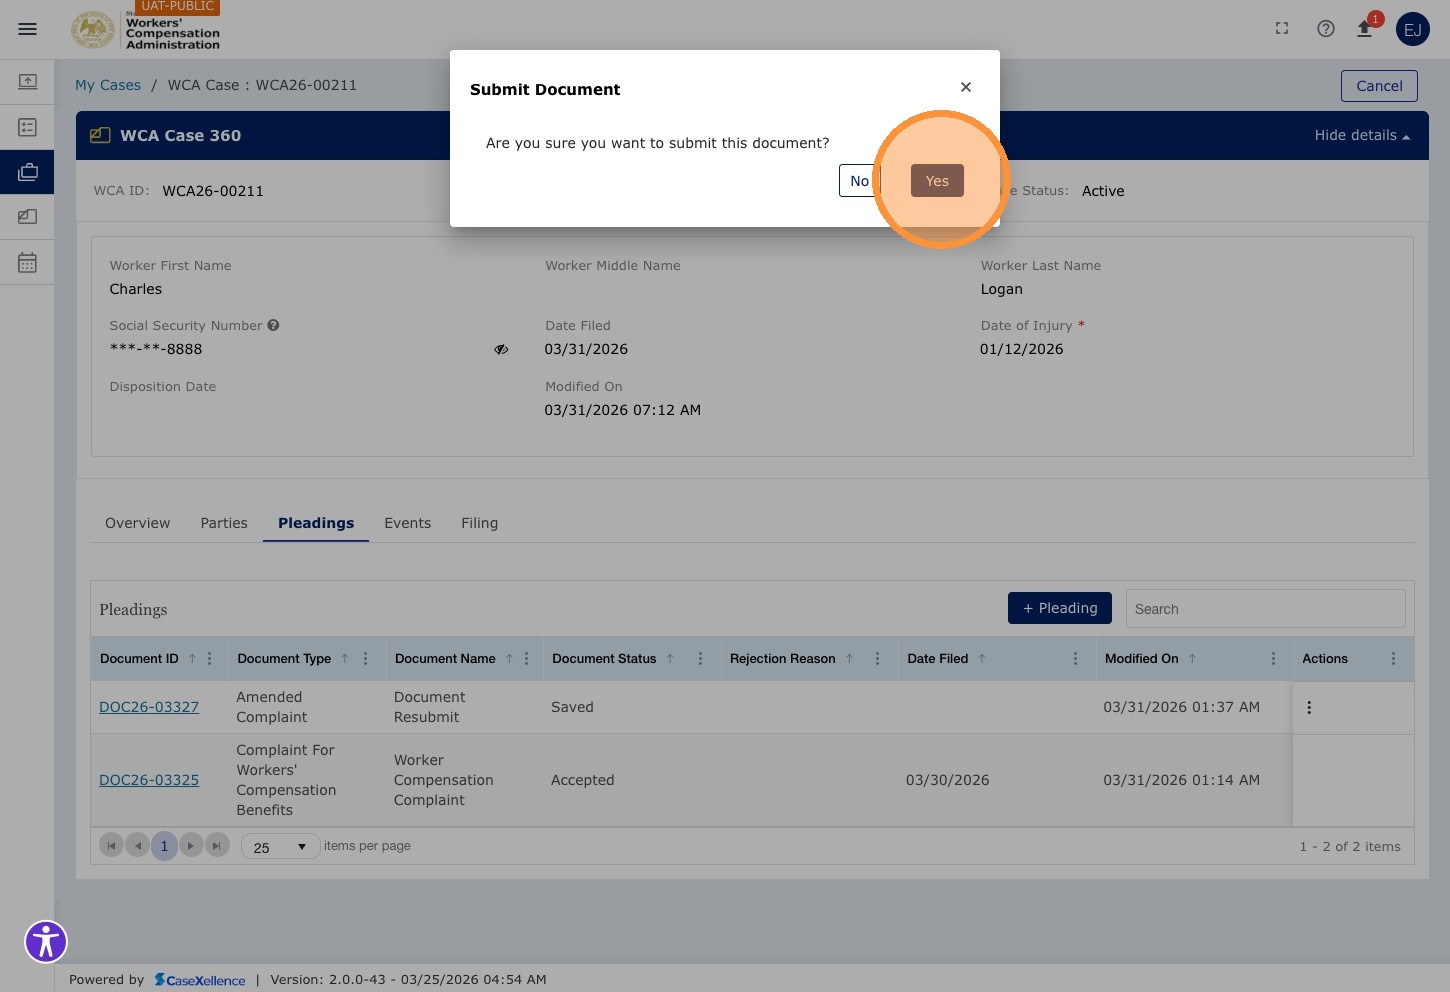
Step 11 — Confirm submission
A confirmation dialog appears. Click Yes to confirm and send the pleading to the Clerk's Office for review.
Step 12 — Submission confirmed
The pleading status updates to Submitted in the Pleadings grid. The Clerk's Office is notified to review the new document.
The Clerk's Office will review the submission and either accept or reject it. You will receive an email notification either way.
Important notes
Initial filing rejections are different. If your initial filing (before the case was accepted and a WCA Case Number was assigned) was rejected, correct and resubmit through the E-Filing / New Filing process. The steps above apply to pleadings on cases that are already accepted.
See also
Portions of this user guide were produced with assistance from artificial intelligence tools; all content was reviewed for accuracy before publication.